
DIY Tips and ideas for creating your own miniature battlefield
In these pages we will cover tips and ideas for building your own terrain pieces for your miniature battlefield. #wargamingterrain,#warhammer40k,#miniaturepainting
Shaun Montgomery, Griffin Williams
9/18/20245 min read
Miniature Wargaming Terrain: DIY Tips and Ideas for Creating Your Own Battlefield
When it comes to miniature wargaming, the battlefield is just as important as the miniatures themselves. A well-crafted terrain adds depth, realism, and excitement to the gaming experience. Best of all, you don't need expensive materials to create an immersive environment. In this guide, we’ll walk through some DIY tips and ideas using common, inexpensive materials like pink insulation foam, hot glue, sand, soup cans, cereal boxes, and even old kids' toys to build your perfect miniature battlefield!
Why Build Your Own Terrain?
Building your own wargaming terrain offers several advantages:
Customization: Tailor your battlefield to the theme of your favorite games.
Cost-Effective: Use household items and upcycled materials to save money.
Creative Expression: Add personal touches that make your battlefield unique and exciting to play on.
Materials You’ll Need:
Pink Insulation Foam: Available at hardware stores, this is perfect for carving and shaping into hills, rocks, or buildings.
Hot Glue Gun: A fast and reliable way to bond materials together.
Sand/Grit: Essential for adding texture to your terrain.
Soup Cans: These can be repurposed into industrial-looking structures or sci-fi-themed towers.
Cereal Boxes: Excellent for creating ruins, walls, and other cardboard-based structures.
Old Kids' Toys: With a bit of modification, toys can become fantastic props or scenery pieces.
Basic Craft Tools: Utility knife, scissors, paint, paintbrushes, and PVA glue.
Step-by-Step DIY Terrain Ideas
1. Crafting Hills and Plateaus with Pink Insulation Foam
Hills are a great way to add dimension and strategic cover to your battlefield. Pink insulation foam is a lightweight, versatile material that’s easy to work with. Here's how to create basic hills:
Step 1: Cut the insulation foam into layers of varying sizes. This will allow you to create a tiered effect for a gradual slope.
Step 2: Use a utility knife to smooth the edges and shape the contours of the foam.
Step 3: Once you have your desired shape, glue the layers together using hot glue.
Step 4: Cover the foam with a mixture of PVA glue and sand to give the hill texture. Let it dry completely before painting.
Pro Tip: Adding small rocks or grit can make the terrain look more realistic.
2. Turning Soup Cans into Industrial Structures
Soup cans make for excellent structures in a sci-fi or industrial-themed game. With a bit of imagination, they can be turned into anything from silos to bunkers:
Step 1: Wash and dry the cans thoroughly.
Step 2: Glue additional details like cardboard panels, strips from cereal boxes, or small plastic bits (from old toys) to the surface to create futuristic control panels or doors.
Step 3: Prime and paint the cans in metallic or weathered colors, adding rust effects for an aged look.
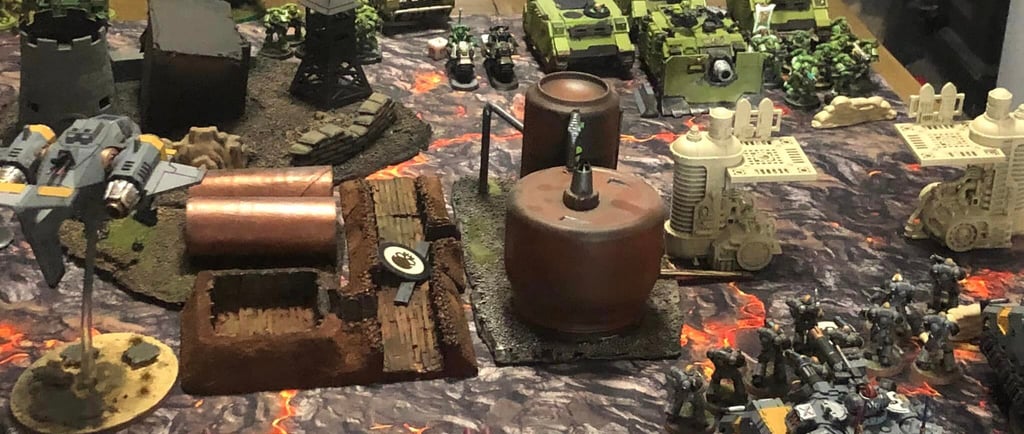
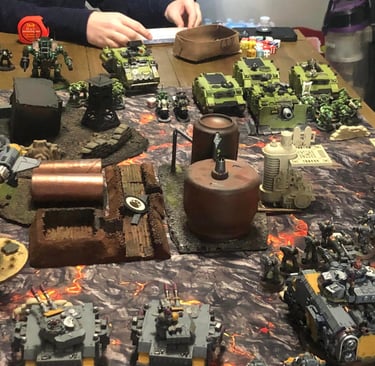
Pro Tip: Use the lid of the can as a base for smaller items like debris piles or crates. Griffin and I have built fuel depots and Oil refineries out of pop cans and old soup cans. Just be sure they are empty before you use them. Bendy straws, tubing and broken pens can be used as pipes and adding a glob of hot glue over a section that’s been split open can create awesome spill effects.
3. Using Cereal Boxes for Buildings and Ruins
Cardboard from cereal boxes can be transformed into almost any structure you need on your battlefield, from medieval ruins to modern buildings:
Step 1: Cut the cardboard into pieces that can form walls, floors, and roofs. Vary the sizes to create depth.
Step 2: Assemble the pieces into the shape of your building using hot glue. Cut out windows or blast holes for a more dynamic look.
Step 3: Add texture by applying sand or grit mixed with PVA glue to the surfaces.
Step 4: Paint the structure to fit your battlefield's theme—whether it’s a bombed-out city or a fantasy fortress.
Pro Tip: For added realism, glue bits of pink insulation foam onto the base for crumbled walls or debris piles. Popsicle sticks and broken bits of stir-sticks can add a degree of realism to your ruins. We will be covering how to incorporate all of these items in tutorial videos over on our YouTube channel. Please be sure to check us out!
4. Repurposing Old Toys for Unique Battlefield Pieces
Don’t throw away those old action figures or toy vehicles—turn them into interactive scenery pieces!
Step 1: Select toys that can fit within your game's scale. Larger toys can be used as obstacles or objective markers.
Step 2: Disassemble parts of the toys to reassemble them into interesting structures. For example, use the legs of a robot toy as supports for a bridge or walkway.
Step 3: Prime and repaint the toys to match your terrain, blending them into your battlefield with weathering effects.
Pro Tip: Incorporating weathered, broken toys adds a sense of destruction and history to your battlefield.
5. Adding Finishing Touches with Sand and Grit
To unify all the elements of your battlefield, sand and grit play a key role in adding texture and realism. Follow these steps:
Step 1: Once your terrain pieces are assembled, apply a layer of PVA glue to areas that would naturally have dirt or rubble.
Step 2: Sprinkle a mixture of sand and small gravel over the glue. Press down gently to ensure it sticks.
Step 3: Let the glue dry, then prime the entire piece with spray paint.
Step 4: Paint the sand and grit with dry brushing techniques to give it a more natural look.
Pro Tip: You can even mix in small bits of plastic or wood to simulate debris for a battle-torn environment.
Final Thoughts
Building your own miniature wargaming terrain doesn’t have to be expensive or difficult. With simple materials like pink insulation foam, soup cans, cereal boxes, and even old kids' toys, you can craft a battlefield that is both functional and immersive. Not only will you save money, but you’ll also have the satisfaction of knowing that every hill, building, and obstacle was crafted by your own hands. So, gather your supplies and get building!
FAQs
Q: Can I use other types of foam for terrain building?
A: Yes! While pink insulation foam is popular due to its sturdiness, other types of foam like Styrofoam can work, though they may be more prone to damage.
Q: How do I prevent cardboard from warping when I apply glue?
A: To prevent warping, apply glue evenly and ensure the cardboard is properly supported as it dries. You can also use thicker pieces of cardboard for a more rigid structure.
Q: What type of paint works best for terrain?
A: Acrylic paints work well for terrain building. They are easy to apply, dry quickly, and are available in a wide range of colors.
By following these tips and using inexpensive, upcycled materials, you can create a diverse and exciting battlefield that enhances your miniature wargaming experience. Happy building!