
Ultimate guide to Airbrushing miniatures for beginners
We take a deep dive into Airbrushing miniatures for beginners. Read on and follow our step by step guide to get started. #miniaturepainting, #airbrushing,#wargaming
Shaun Montgomery
9/26/20246 min read
Airbrushing Miniatures for Beginners: Your Ultimate Guide to Getting Started
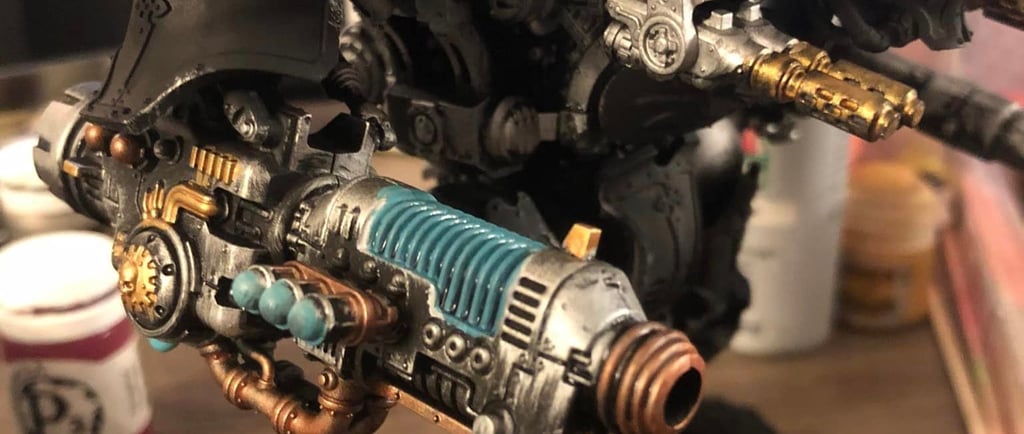
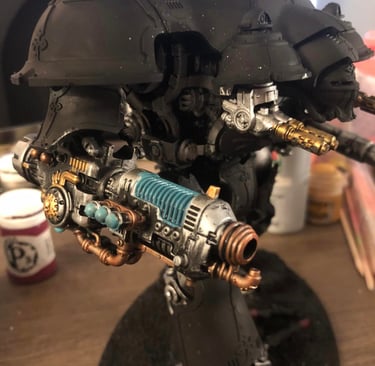
Airbrushing miniatures can seem a bit intimidating at first, but once you get the hang of it, it’s a total game-changer. With an airbrush, you can achieve smooth blends, perfect base coats, and even tackle large models in a fraction of the time it would take with a traditional brush. If you’re a beginner and feeling a bit overwhelmed by the idea of airbrushing, don’t worry—you’ve come to the right place!
In this guide, we’ll cover everything you need to know to get started with airbrushing miniatures. From choosing the right equipment to basic techniques, I’ve got you covered.
Why Should You Start Airbrushing?
Airbrushing offers a few big advantages over traditional brush painting:
Speed: You can base coat and prime your miniatures much faster.
Smooth Blends: Airbrushing makes it easier to achieve flawless gradients, which can be challenging with a brush.
Coverage: It’s perfect for larger models or vehicles where using a brush would be time-consuming and uneven.
Precision: With practice, airbrushing can give you control over fine details.
While it might seem like an investment upfront, the time and effort you’ll save make it worth it in the long run! I started with a combination kit I picked up at Harbor freight and practiced on those die cast metal cars you find at Discount toy stores. I typically use my airbrush now for priming and laying down base coats with speed.
What Do You Need to Start Airbrushing?
Before diving into techniques, you’ll need to gather some basic equipment. Here’s what you’ll need to start airbrushing miniatures:
Airbrush
There are different types of airbrushes, but for beginners, I recommend starting with a dual-action gravity feed airbrush. Dual-action gives you control over both the airflow and the amount of paint, while gravity feed allows for better precision with less paint.Compressor
Your airbrush needs a compressor to supply air pressure. Look for a compressor with an air tank and a moisture trap to keep the airflow consistent and clean.Airbrush Paints
Not all paints work well in airbrushes. You’ll need to use acrylic paints specifically designed for airbrushing or thin regular acrylics to the right consistency (more on that later!).Thinner
Even if you’re using airbrush-ready paints, you’ll often need a thinner. Paint needs to flow smoothly through the airbrush, and thinner ensures the right consistency without clogging.Airbrush Cleaner
Keeping your airbrush clean is crucial for it to function properly. Always have airbrush cleaner on hand to flush out any leftover paint after each session.Safety Gear
Airbrushing creates fine particles that can be harmful if inhaled. Use a spray booth or make sure you’re in a well-ventilated area, and always wear a respirator mask to protect your lungs.
Pro Tip: Don’t forget to have a good supply of paper towels and cotton swabs. These are lifesavers when it comes to cleaning your airbrush between color changes or dealing with clogs.
Getting Started: Basic Airbrushing Techniques
Now that you’ve got your equipment, it’s time to learn the basics of airbrushing. As a beginner, you don’t need to master every technique right away—start simple and build your skills over time.
1. Priming Your Miniature
One of the best things about airbrushing is how easy it makes priming. Instead of using a rattle can, you can get a smooth, even coat of primer with an airbrush. This step creates a good surface for your paints to adhere to.
How to Do It:
Load your airbrush with primer (you can use an airbrush-ready primer or thin your regular primer) and spray the miniature in light, even passes. Keep the airbrush about 4-6 inches away from the model and move in smooth, sweeping motions.Common Mistake: Don’t overdo it! Spraying too much primer at once can clog up details. It’s better to build up thin layers rather than trying to cover everything in one go.
2. Base Coating
Airbrushing your base coats is one of the most time-saving aspects of using an airbrush. It’s perfect for getting a smooth, even coat over your entire model, especially on large miniatures.
How to Do It:
Thin your paint to about the consistency of skim milk. Start with light, broad passes, gradually building up coverage. Keep your airbrush moving—don’t hover over one spot for too long, or you’ll risk pooling the paint.Pro Tip: To get the perfect paint consistency, start by adding a few drops of thinner to your airbrush and mix it with the paint directly in the cup. If the paint flows easily and doesn’t splatter, you’re good to go!
Tip: If you’re not sure how much to thin your paints, err on the side of caution and thin more than you think. You can always add more layers, but thick paint will clog your airbrush.
3. Shading and Gradients
One of the most exciting things about airbrushing is how easy it makes creating smooth color transitions, perfect for shading and highlights.
How to Do It:
To shade or highlight a miniature, angle the airbrush so that only part of the model gets hit by the paint. For highlights, focus on areas where light would naturally hit, and for shading, target recesses or areas that should appear darker. Start with light coats and build up gradually for a natural-looking gradient.Mistake to Avoid: Don’t go too heavy with the shading at first. Build up the shadows slowly with thin coats, or you may end up with harsh transitions that look unnatural.
4. Fine Details
Yes, you can use an airbrush for detail work too! Once you’re more comfortable with your airbrush, you can use it for fine details like edge highlights or even stencils for intricate designs.
How to Do It:
For fine details, turn down the air pressure on your compressor and use thinner paint. Hold the airbrush closer to the miniature and apply paint in short, controlled bursts.
Tip: If you’re nervous about airbrushing details, practice on a piece of cardboard or an old model first. You’ll quickly get a feel for how close you can get to the model and how much paint to apply.
Cleaning and Maintenance
One of the most important parts of airbrushing is keeping your equipment clean. Paint can quickly dry inside the airbrush, clogging it up and causing issues with your next project.
After Every Use:
After each session, flush your airbrush with cleaner or water until it runs clear. This will prevent any paint from drying inside and causing clogs.Deep Cleaning:
Every so often, disassemble your airbrush and give it a deep clean. Use a cleaning brush or cotton swab to reach inside the nozzle and needle to remove any built-up paint. Keeping your airbrush in top condition will extend its lifespan and keep it running smoothly. I made the mistake of not cleaning my airbrush enough after each use and eventually it clogged to the point of breaking. Don’t make my mistake and make to clean after each use.
Pro Tip: If you notice your airbrush is sputtering or the paint isn’t coming out evenly, it’s usually a sign that something is clogged. Stop, clean it out, and try again.
Common Beginner Mistakes (And How to Avoid Them)
It’s normal to make mistakes when you’re just starting out with airbrushing. Here are a few common pitfalls and how to avoid them:
Not Thinning Paint Enough
One of the biggest challenges for beginners is finding the right paint consistency. Too thick, and the paint will clog the airbrush; too thin, and it’ll be runny and hard to control.Solution: Thin your paint to the consistency of skim milk, and always test it on a scrap surface before spraying your miniature.
Spraying Too Close
Holding the airbrush too close to the model can lead to over-spraying or pooling paint in details.Solution: Keep the airbrush about 4-6 inches away from the model for base coats and larger areas, and only get closer for fine detail work.
Neglecting Regular Cleaning
Skipping cleaning sessions can lead to clogged nozzles and poor performance.Solution: Flush your airbrush with cleaner or water after every color change, and do a deep clean after each session.
Going Too Heavy with the Paint
It can be tempting to try and cover everything in one go, but heavy coats of paint can obscure details and lead to uneven finishes.Solution: Apply multiple thin layers, and be patient. You’ll get much better results with several light coats than one thick one.
Final Thoughts on Airbrushing Miniatures for Beginners
Airbrushing may seem complex at first, but with practice and patience, it can transform your miniature painting process. It’s a fantastic tool for speeding up base coats, achieving smooth gradients, and even mastering fine details. Just remember to start slow, experiment, and keep your equipment clean. Before you know it, you’ll be airbrushing like a pro!
FAQs
Do I need a special airbrush for miniatures?
While any airbrush can work, a dual-action gravity feed airbrush is ideal for miniature painting due to its precision.How often should I clean my airbrush?
Clean your airbrush after every session and between colors to avoid clogs and ensure smooth operation.
Is airbrushing worth the investment for beginners?
Absolutely! While there’s an upfront cost, the time and quality improvements make it a great investment for serious hobbyists.